Contact Page Form
What this section does
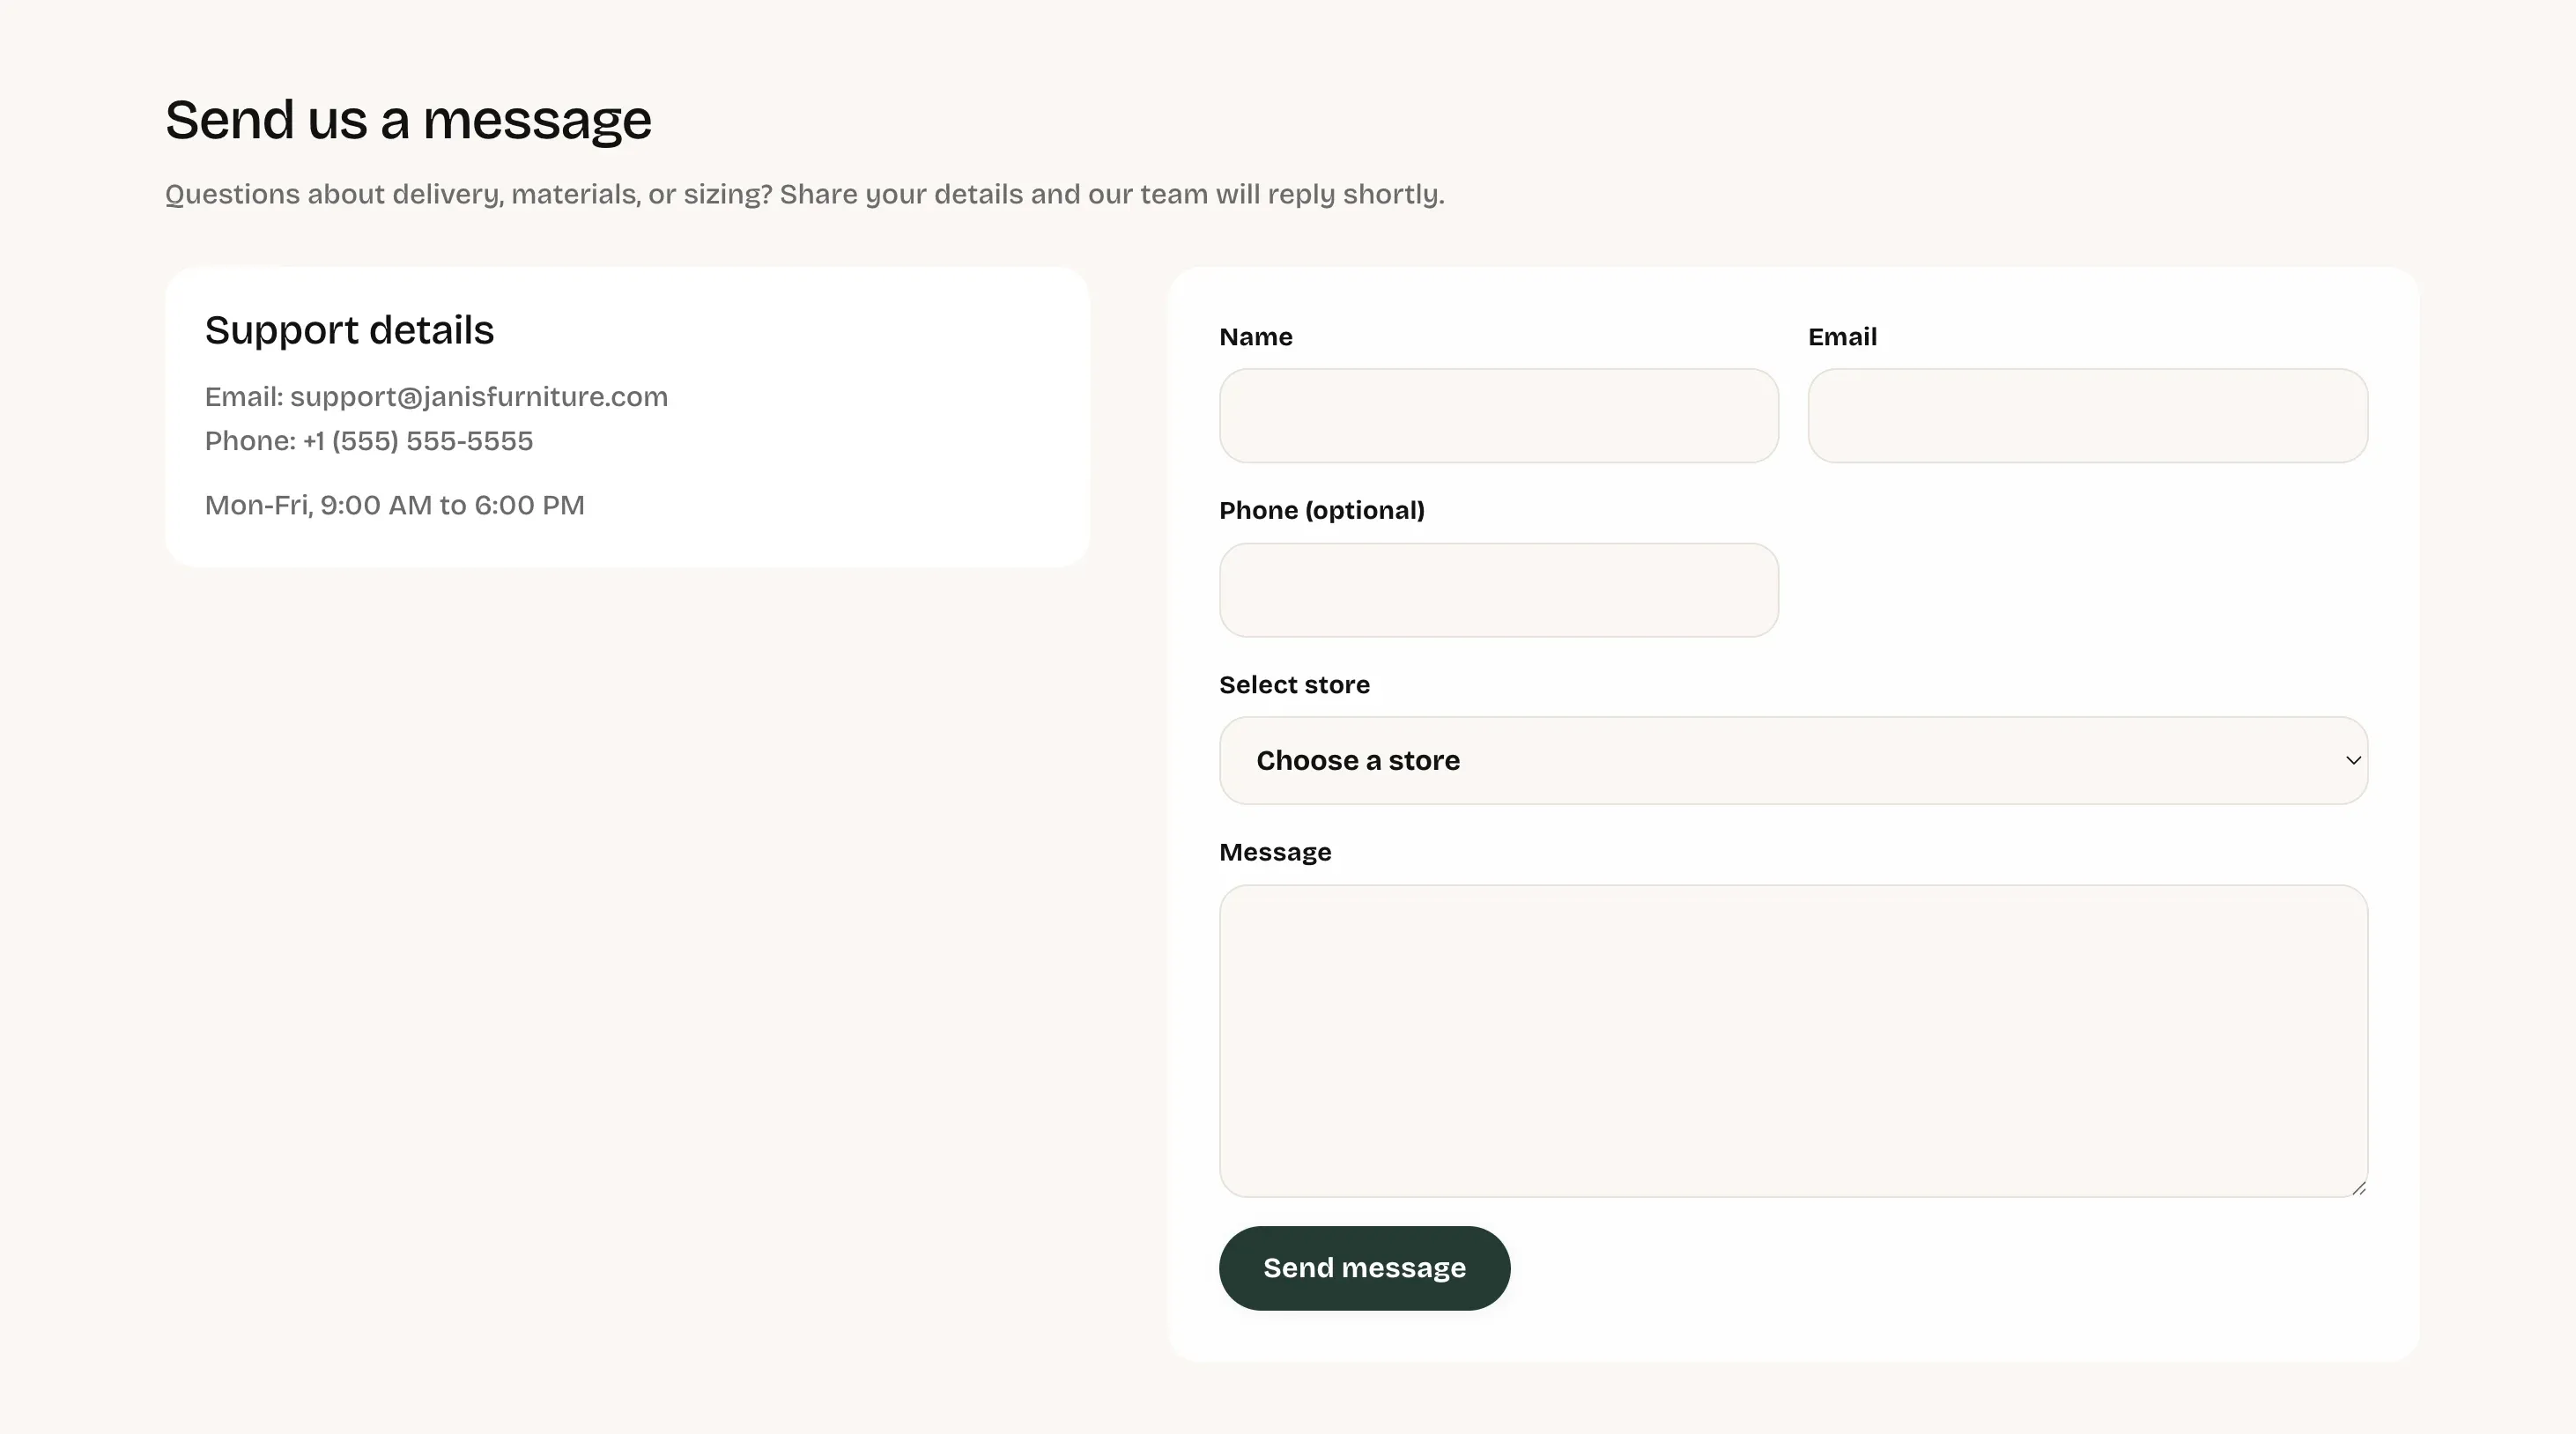
Section titled “What this section does”The Contact form section powers the main inquiry area on the Contact page. It combines:
- A heading and intro line.
- A support details panel (email, phone, hours, or any rich text).
- A customer form with name, email, phone, store selector, and message fields.
Where it appears
Section titled “Where it appears”- Template: Contact page (
page.contact). - Section type:
contact-form. - Section order on page.contact: after the page hero and before the store carousel.
How to set it up
Section titled “How to set it up”- Go to Online Store -> Themes.
- Click Customize.
- Open the Contact template/page.
- Select Contact form in the left sidebar.
- Configure section settings and save.
Key section settings explained
Section titled “Key section settings explained”- Heading: main section title.
- Text: short intro under the heading.
- Support heading: title above the support details panel.
- Support text: rich text for email, phone, business hours, or response expectations.
- Store dropdown label: label above the store selector field.
- Store dropdown placeholder: initial unselected option text.
- Store options (one per line): dropdown options shown to customers.
- Button label: submit button text.
Form behavior
Section titled “Form behavior”- Required fields: Name, Email, Message.
- Optional fields: Phone, Store selection.
- Store options parsing: each non-empty line in Store options becomes one dropdown option.
- Blank lines are ignored in store options.
- On successful submit, customers see:
Thanks — we’ll get back to you soon. - Shopify field mapping:
contact[name]contact[email]contact[phone]contact[store_location]contact[body]
Common tasks
Section titled “Common tasks”Add or remove stores in the dropdown
Section titled “Add or remove stores in the dropdown”- Open Store options (one per line).
- Add, edit, or remove lines.
- Save and test the dropdown on the storefront.
Update support details
Section titled “Update support details”- Edit Support heading and Support text.
- Keep contact methods and hours current.
- Save and verify formatting.
Change the submit call-to-action
Section titled “Change the submit call-to-action”- Update Button label.
- Save and submit a test form once.
- Keep support text concise and scannable.
- Use one store per line with consistent naming.
- Keep placeholder text action-oriented (example:
Choose a store). - Test on mobile to confirm two-column fields collapse cleanly.
Why are no stores visible in the dropdown?
Section titled “Why are no stores visible in the dropdown?”Store options is empty or only contains blank lines.
Why is the form not sending with partial details?
Section titled “Why is the form not sending with partial details?”Name, Email, and Message are required.
Can merchants remove the store selector from settings only?
Section titled “Can merchants remove the store selector from settings only?”No. This section always renders the selector field; removing it requires code changes.
Related guides
Section titled “Related guides”- Store Locations Documentation
- About Contact Store Carousel Documentation
- Theme Documentation
- Contact page
Publish checklist
Section titled “Publish checklist”- Confirm heading and intro copy.
- Confirm support panel details (email, phone, hours).
- Confirm store dropdown options are current.
- Submit a test message.
- Verify desktop and mobile layout.
Need help?
Section titled “Need help?”If you still need help, contact support via the Contact page.