Bundle Builder
What this page does
Section titled “What this page does”The Bundle Builder page lets shoppers create a custom room set by selecting products from a grid. As items are selected, the right-side summary panel tracks progress, prices, savings, and checkout readiness.
Bundle states shoppers see
Section titled “Bundle states shoppers see”Before the minimum is reached
Section titled “Before the minimum is reached”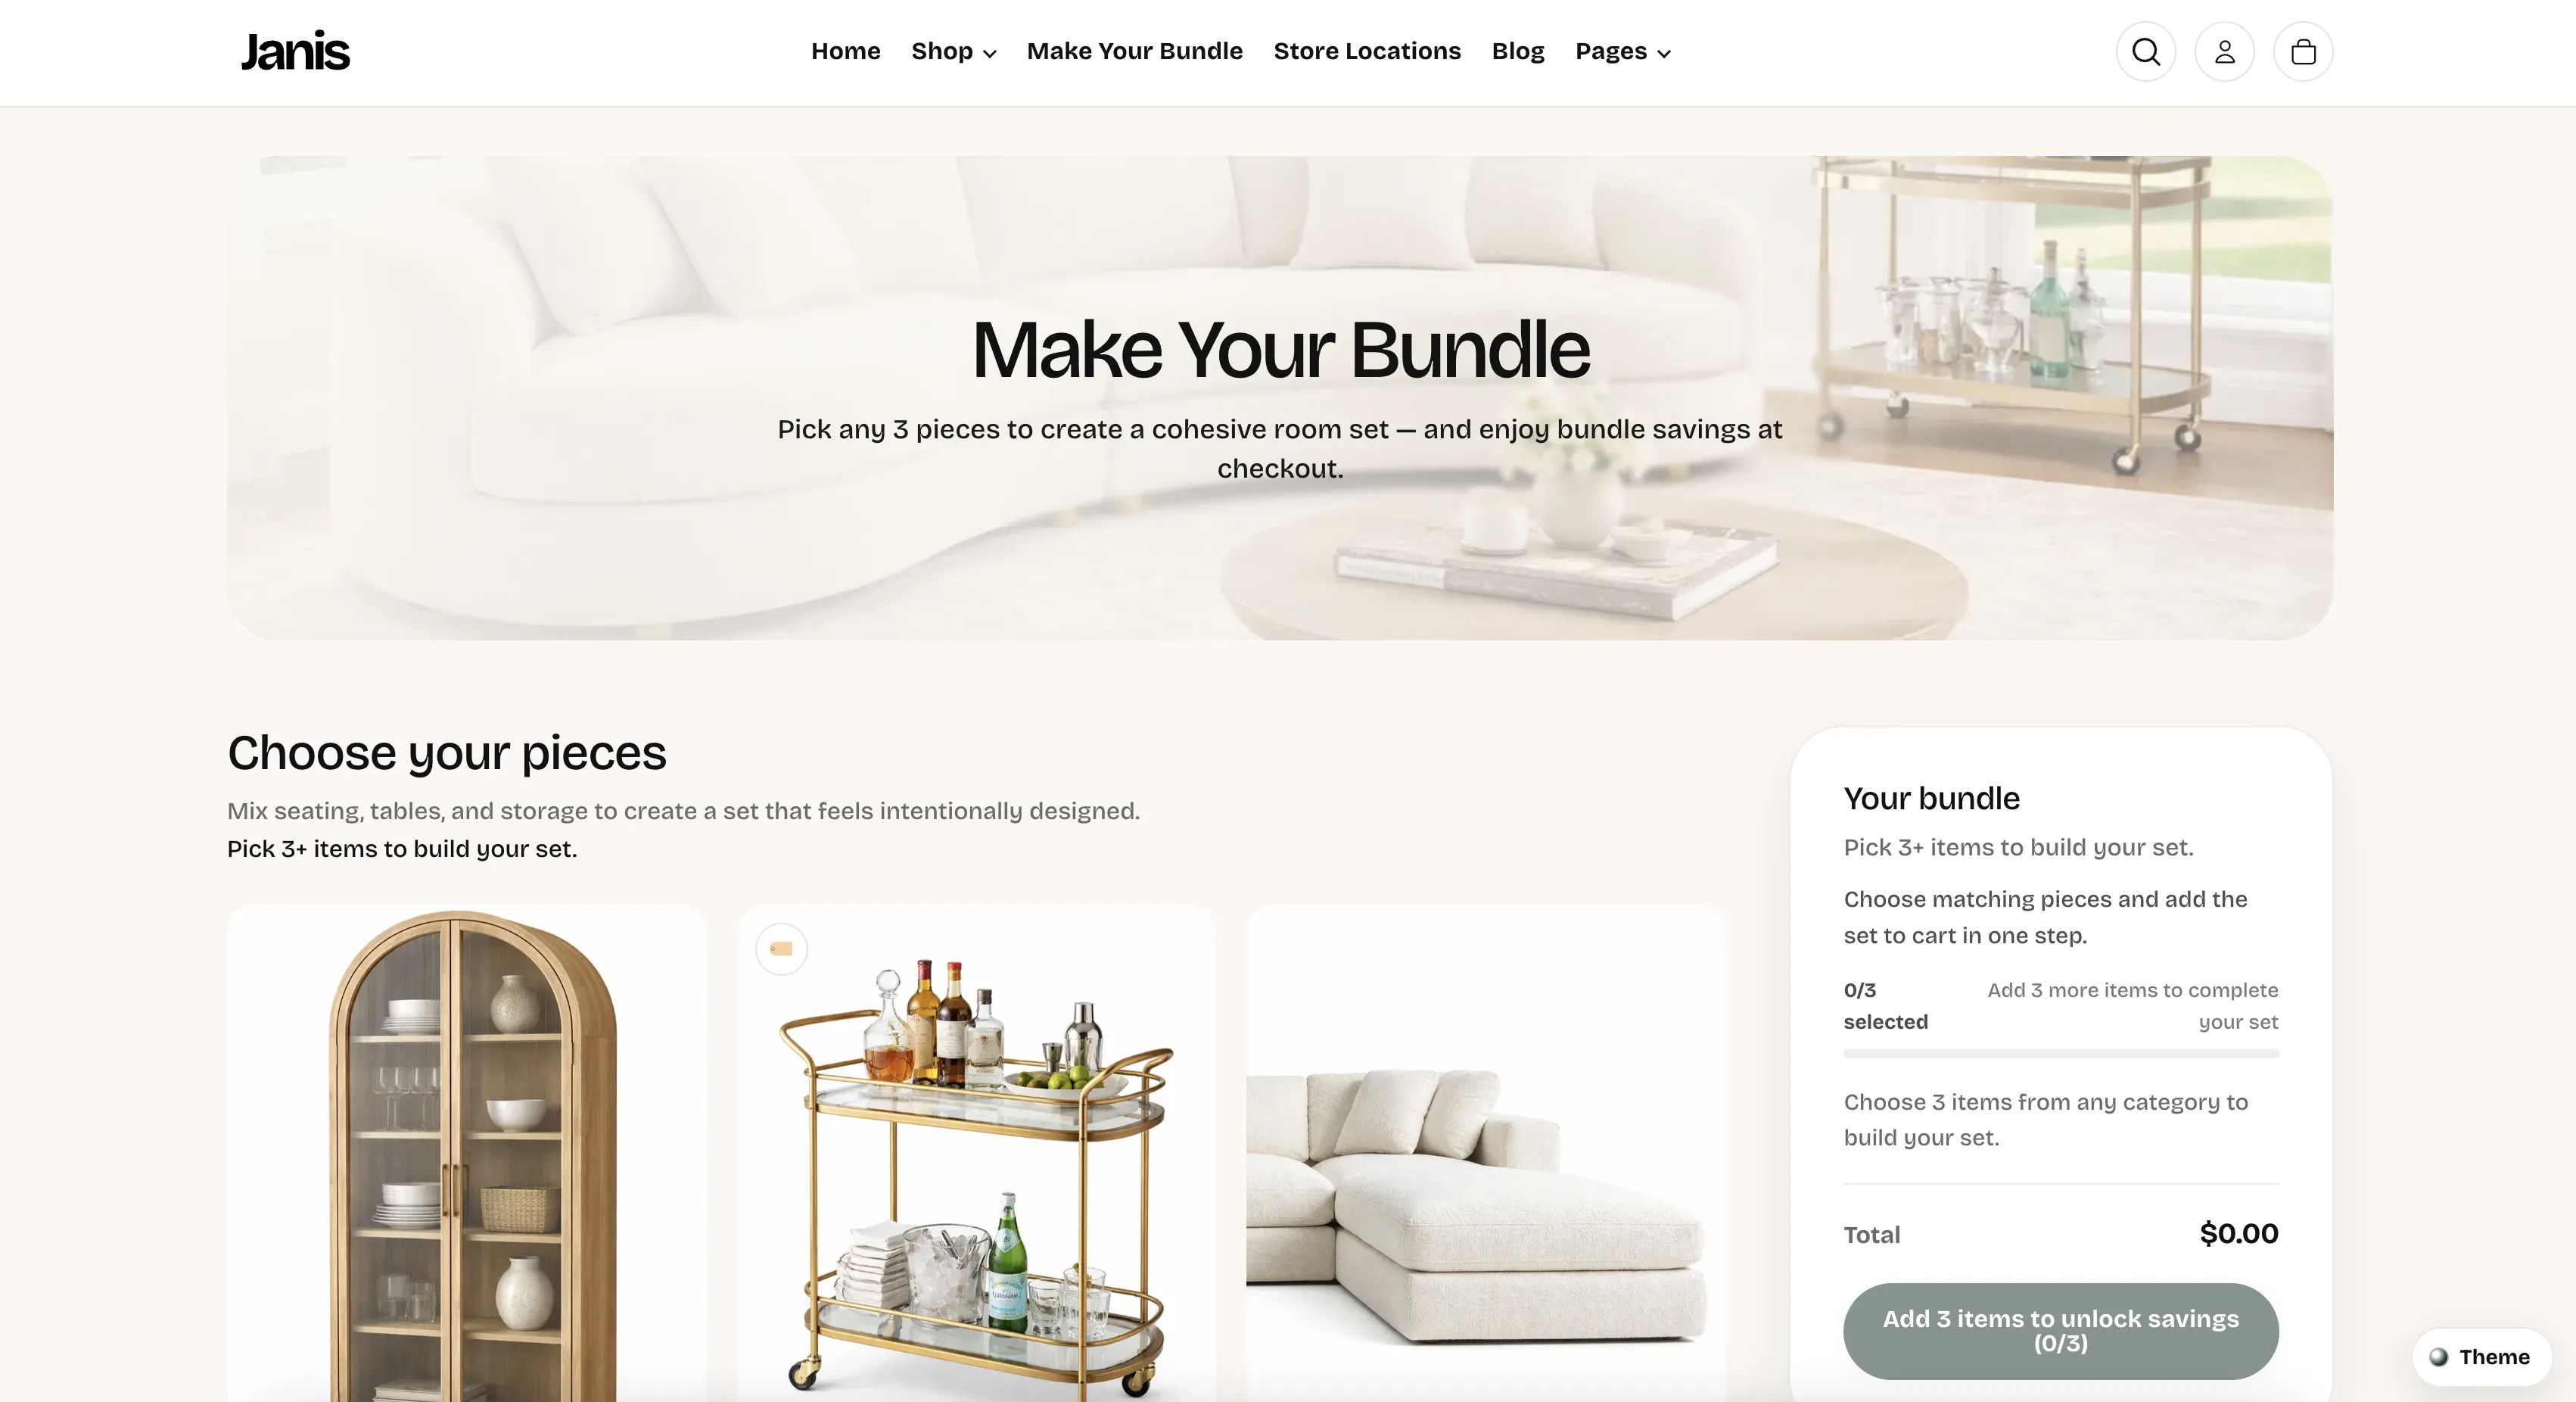
After the minimum is reached
Section titled “After the minimum is reached”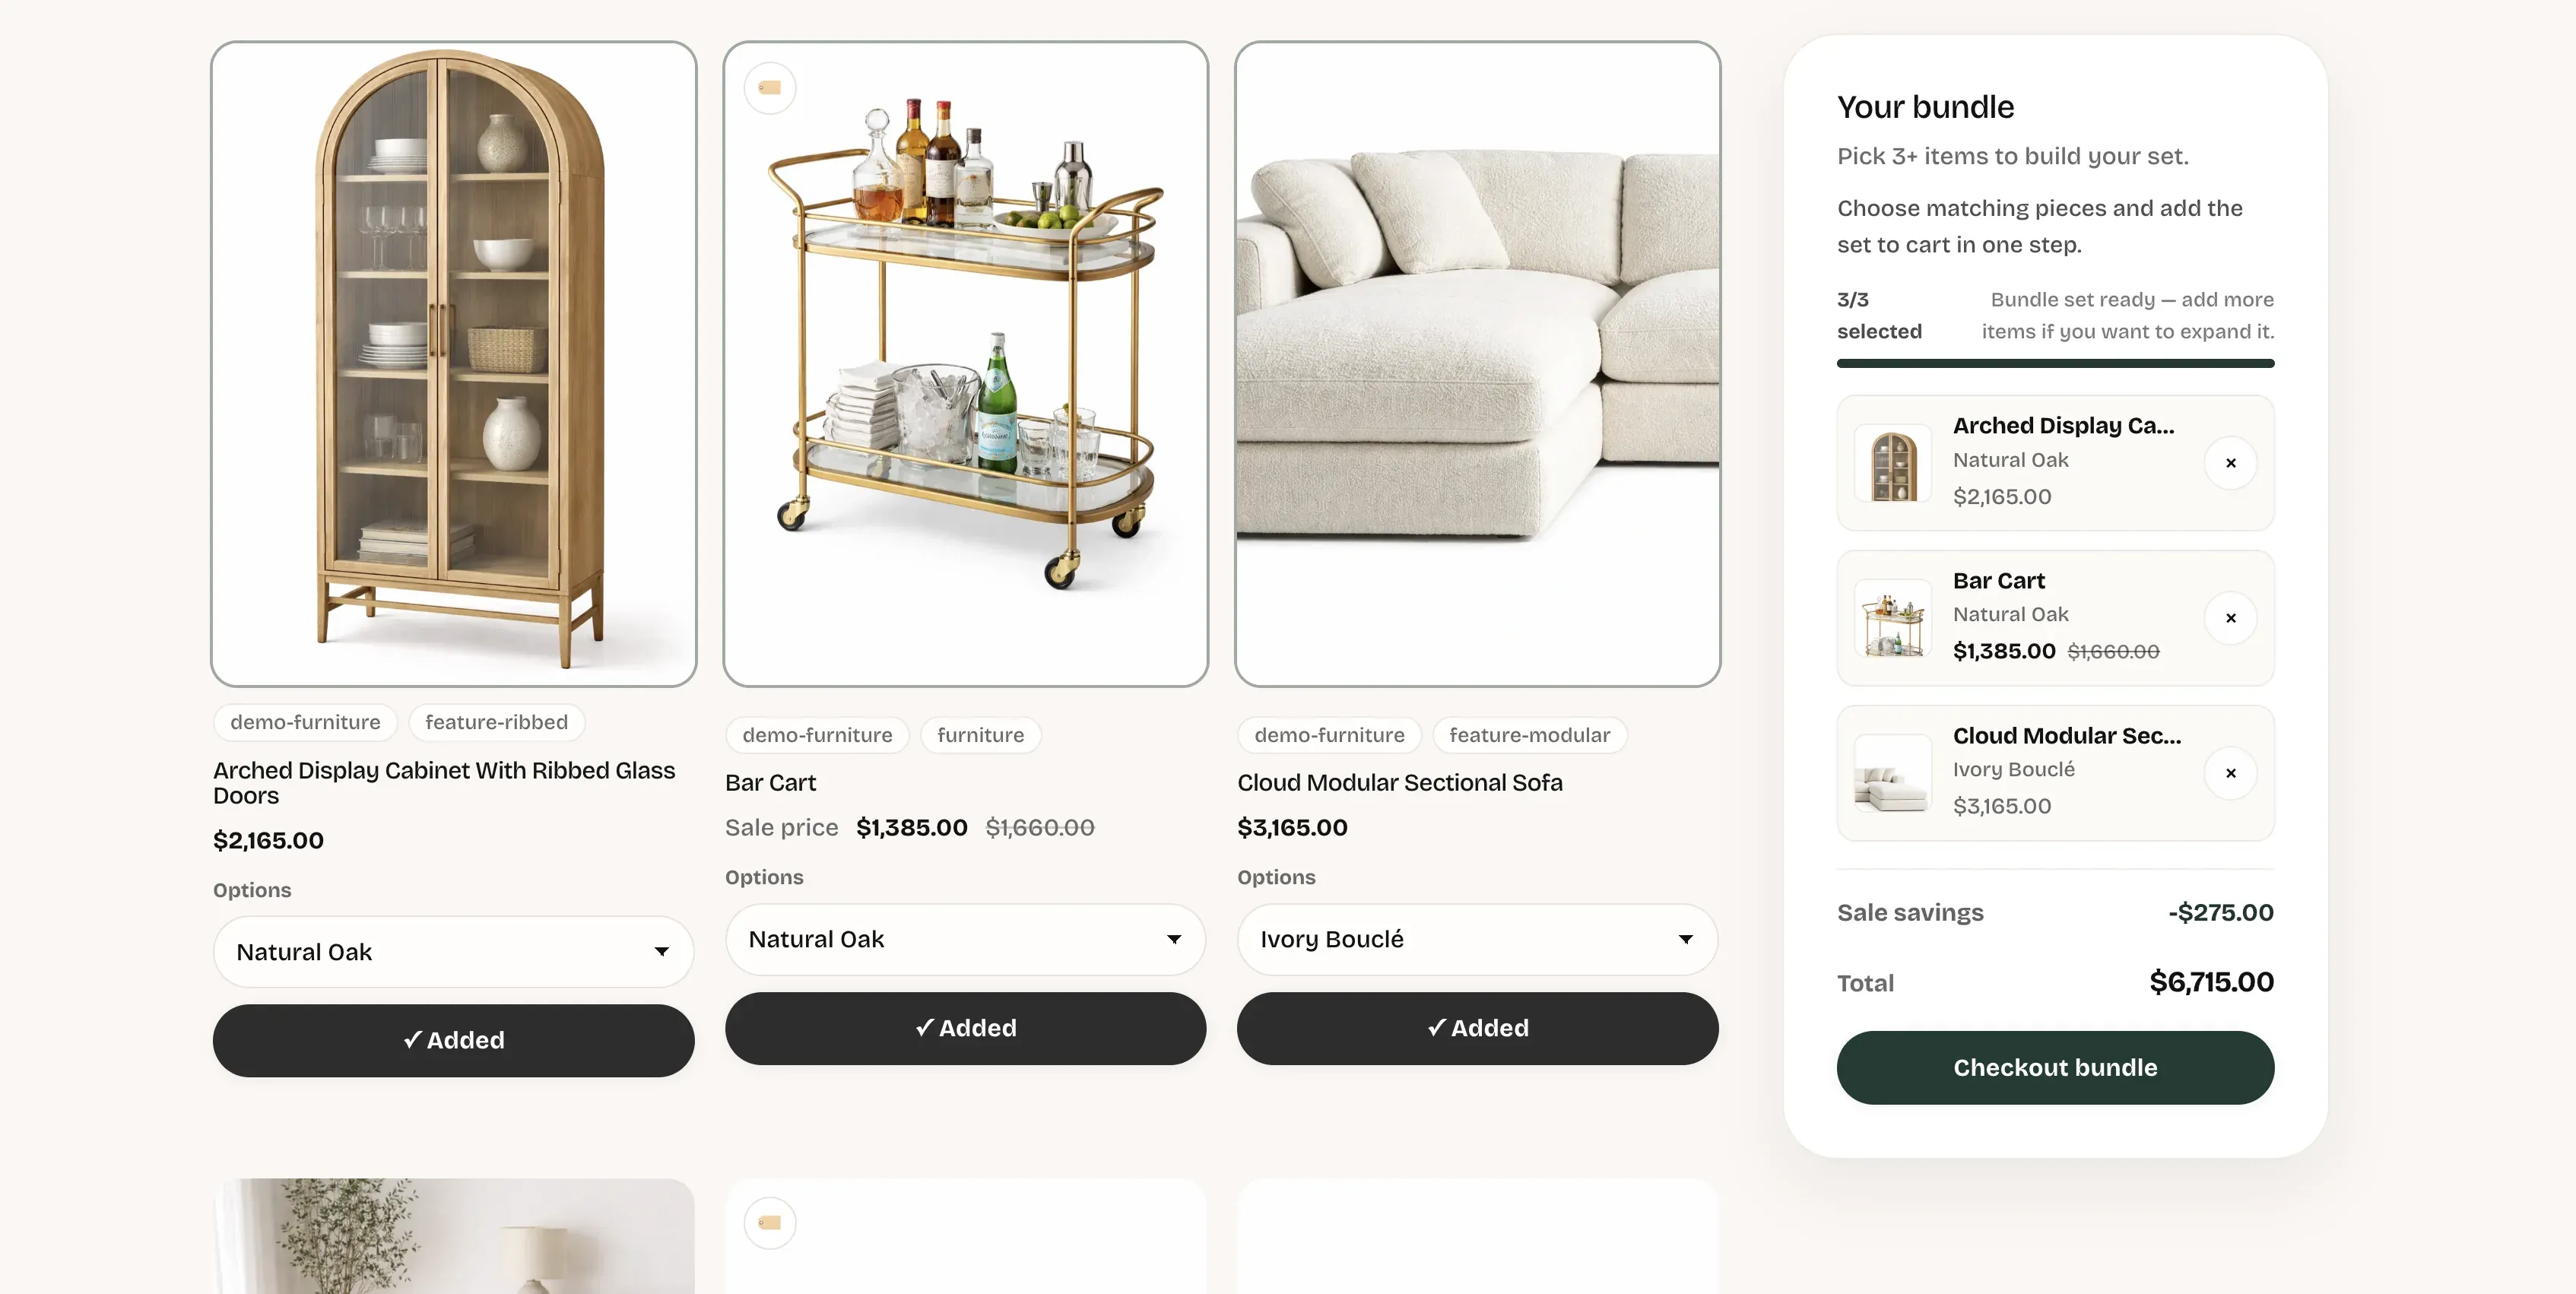
How shoppers build a bundle
Section titled “How shoppers build a bundle”- Open the Make Your Bundle page.
- Choose product options (variant dropdown) on each card as needed.
- Click Add to bundle on a product card.
- Repeat until the minimum count is reached (default: 3 items).
- Review selected items in the Your bundle panel.
- Click Checkout bundle to add selected variants to cart in one step and continue to cart.
How shoppers remove products from a bundle
Section titled “How shoppers remove products from a bundle”Shoppers can remove items in two ways:
- Click ✓ Added on the product card to toggle it off.
- Click the × remove button in the summary list on the right panel.
After removal, progress, totals, and checkout state update immediately.
How pricing and savings work
Section titled “How pricing and savings work”- Progress gate:
- Checkout button stays disabled until minimum items are selected.
- Total:
- Summary total recalculates live as items are added, removed, or variant-changed.
- Sale savings:
- If selected variants have compare-at pricing, sale savings appear in summary.
- Bundle extra savings:
- Appears only when bundle discount is configured for selected items.
- Variant changes:
- If a selected card’s option changes, summary item pricing updates to match the new variant.
Important behavior rules
Section titled “Important behavior rules”- Minimum item count is controlled by Minimum items in section settings.
- One selection per product card: adding the same card again toggles remove, not quantity increase.
- Selection is remembered in session storage for the current browser tab/session.
- Checkout action posts selected variants to
/cart/add.jsand redirects to/cart. - If checkout add fails, button state resets and shopper can retry.
Merchant setup in Theme Editor
Section titled “Merchant setup in Theme Editor”- Go to Online Store -> Themes.
- Click Customize.
- Open a page using the page.bundle-builder template.
- Select Bundle builder page section.
- Configure:
- Hero image
- Heading
- Subheading
- Products collection
- Products to show
- Minimum items
- Products heading
- Products text
- Summary heading
- Summary text
- Empty state text
- Add/edit Benefit blocks for summary panel trust points.
- Save.
Common merchant tasks
Section titled “Common merchant tasks”Change required bundle size
Section titled “Change required bundle size”- Update Minimum items.
- Verify progress copy and button text in preview.
- Save.
Restrict which products can be bundled
Section titled “Restrict which products can be bundled”- Set Products collection to a curated collection.
- Set Products to show to desired limit.
- Save.
Improve empty-state guidance
Section titled “Improve empty-state guidance”- Update Empty state text with clear shopper instruction.
- Save and test with no selections.
Why is Checkout bundle disabled?
Section titled “Why is Checkout bundle disabled?”The shopper has not yet reached the configured minimum item count.
Why did an item price change after selecting it?
Section titled “Why did an item price change after selecting it?”The shopper changed variant options; summary always reflects the currently selected variant.
Why do I see sale savings but no bundle extra savings?
Section titled “Why do I see sale savings but no bundle extra savings?”Sale savings come from compare-at pricing. Bundle extra savings only appear when bundle discount is configured for selected items.
Can shoppers add quantity 2 of the same bundle card?
Section titled “Can shoppers add quantity 2 of the same bundle card?”Not through one card selection. The current flow is one selected item per product card.
Related guides
Section titled “Related guides”Publish checklist
Section titled “Publish checklist”- Verify page template is
page.bundle-builder. - Verify collection and product limit are correct.
- Verify minimum item threshold and button behavior.
- Test add/remove from both card and summary panel.
- Complete a test checkout from bundle to cart.
Need help?
Section titled “Need help?”If you still need help, contact support via the Contact page.