Getting started
What this section does
Section titled “What this section does”This guide takes you from a freshly installed app to a page that is live on your storefront.
Before you start
Section titled “Before you start”Have these ready:
- A Shopify store where you can install apps.
- A published theme.
- Any images you want to use, or the products and collections the page should feature.
- Your brand colors and fonts, if you already have them defined.
Install and open the app
Section titled “Install and open the app”- Install Bran Page Builder from the Shopify App Store.
- Review the permissions requested during installation and approve them.
- The app opens inside Shopify admin. You can reopen it later from Apps in your Shopify admin sidebar.
What the app asks access for
Section titled “What the app asks access for”Bran requests only the access a page builder needs:
- Products and collections — read access, so product and collection components can show your real catalog.
- Blog content and pages — so blog components can list your posts, and so published Bran pages can be created and updated on your Online Store.
- Themes — so the app can read your theme’s styling and place page sections.
- Files — so you can upload and use images inside your pages.
Bran does not request access to orders, customers, or payment data.
Step 1 — Set up your Design System
Section titled “Step 1 — Set up your Design System”- Open Design System.
- On the Presets tab, choose Your theme to match your active theme, or pick a preset such as Minimal, Luxury, or Editorial as a starting point.
- Open the Style tab to adjust colors, typography, spacing, and button styles as needed.
- Name your style, then select Save & activate to apply it to your storefront. Save style keeps it as a draft without going live.
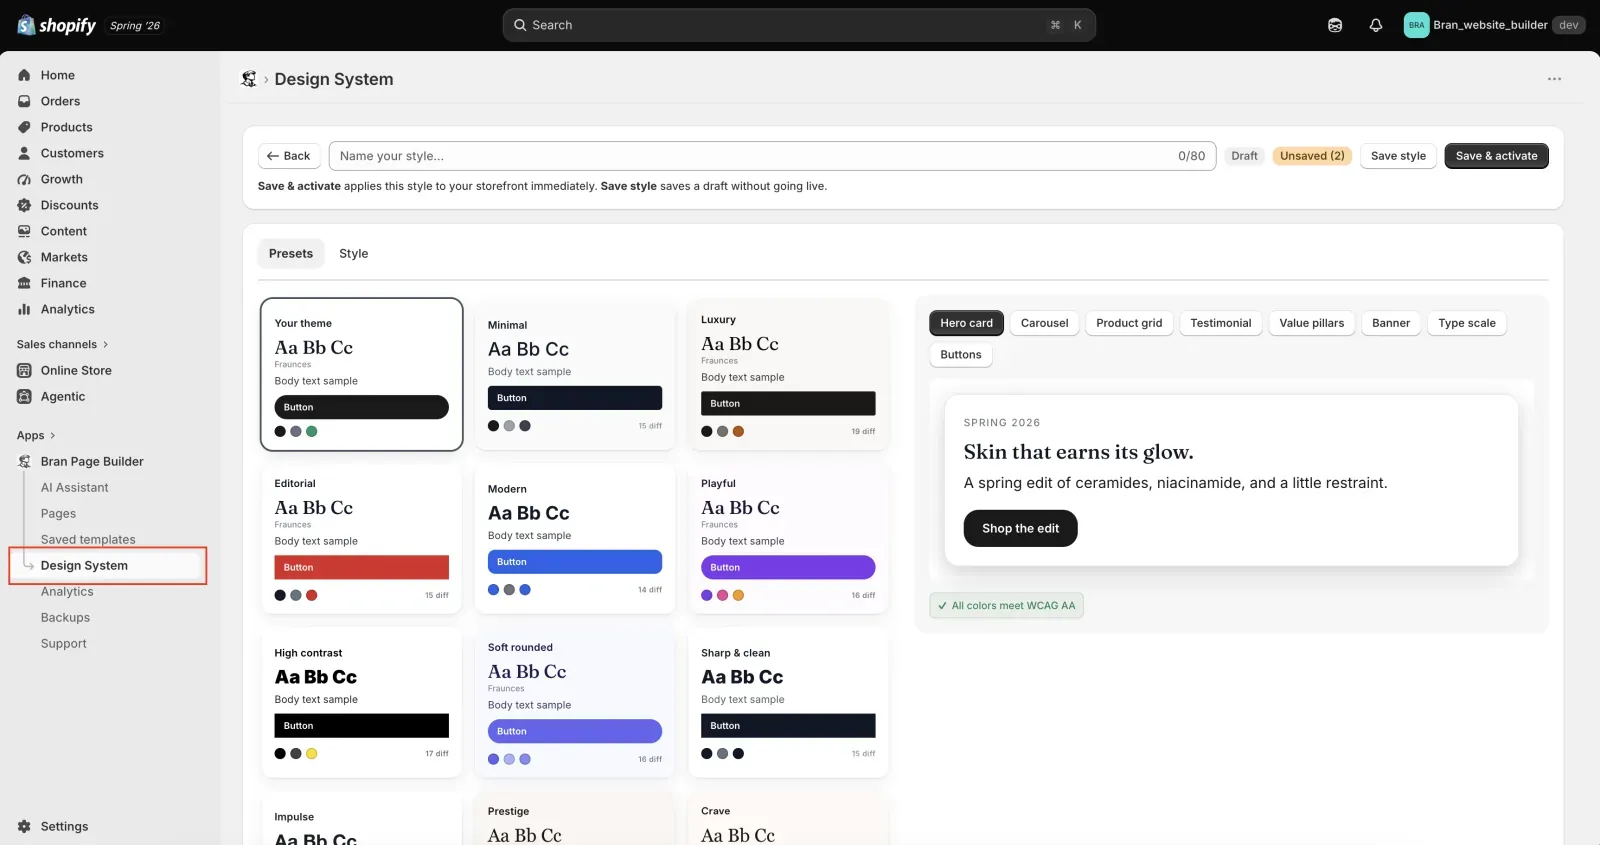
Doing this first means every component you add later already looks like your store. See Design System for the full reference.
Step 2 — Create your first page
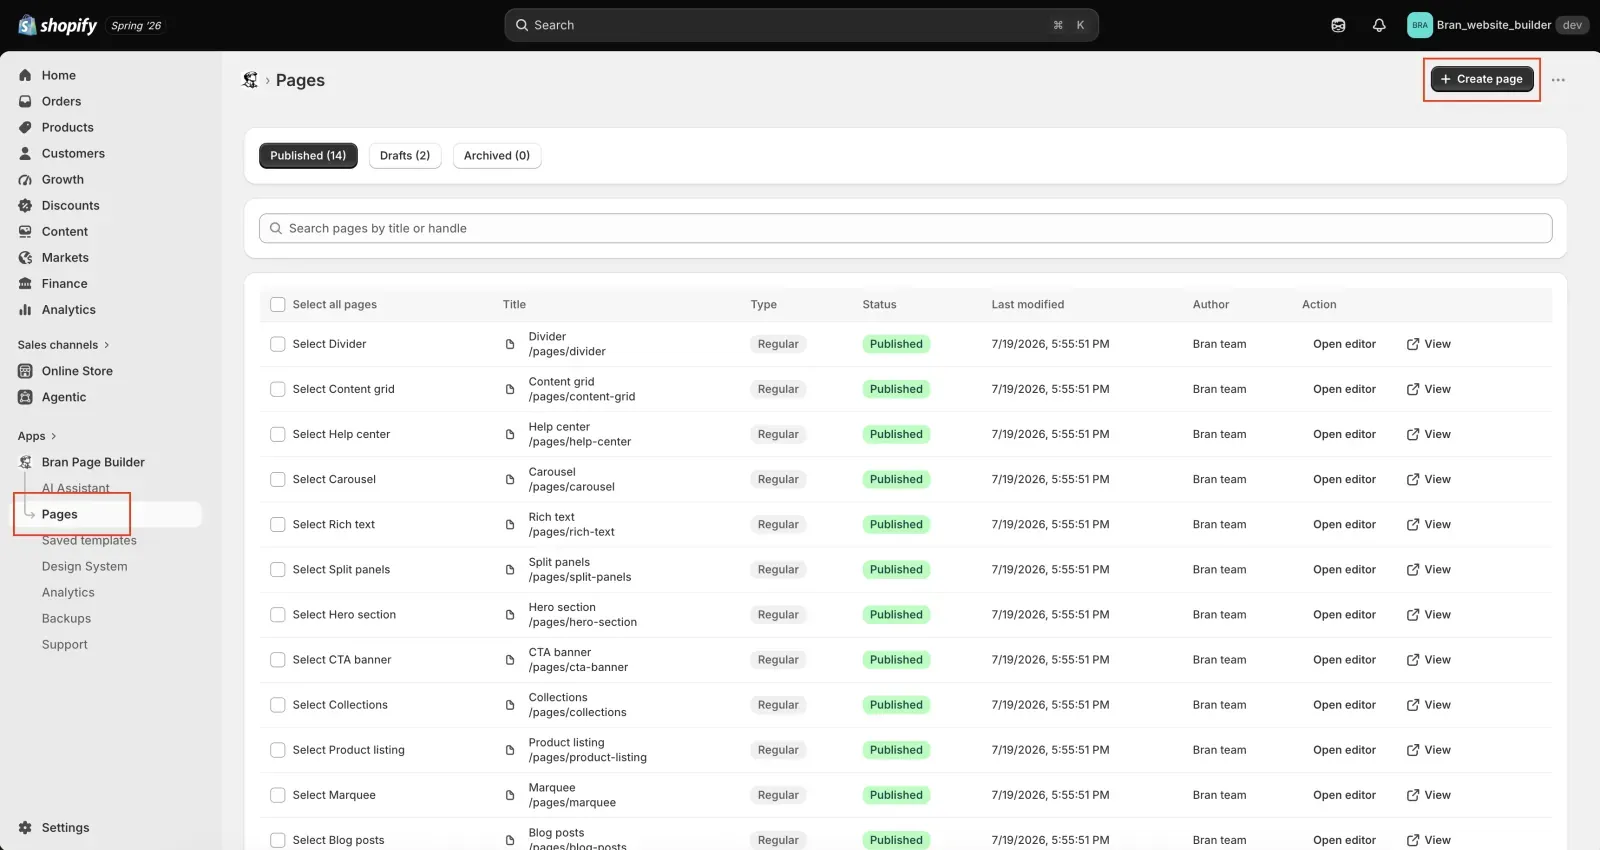
Section titled “Step 2 — Create your first page”- Open Pages.
- Select Create page.
- Choose a page type. Choose Regular for a standard content page such as a landing page, About page, or campaign page.
- Continue into the editor.
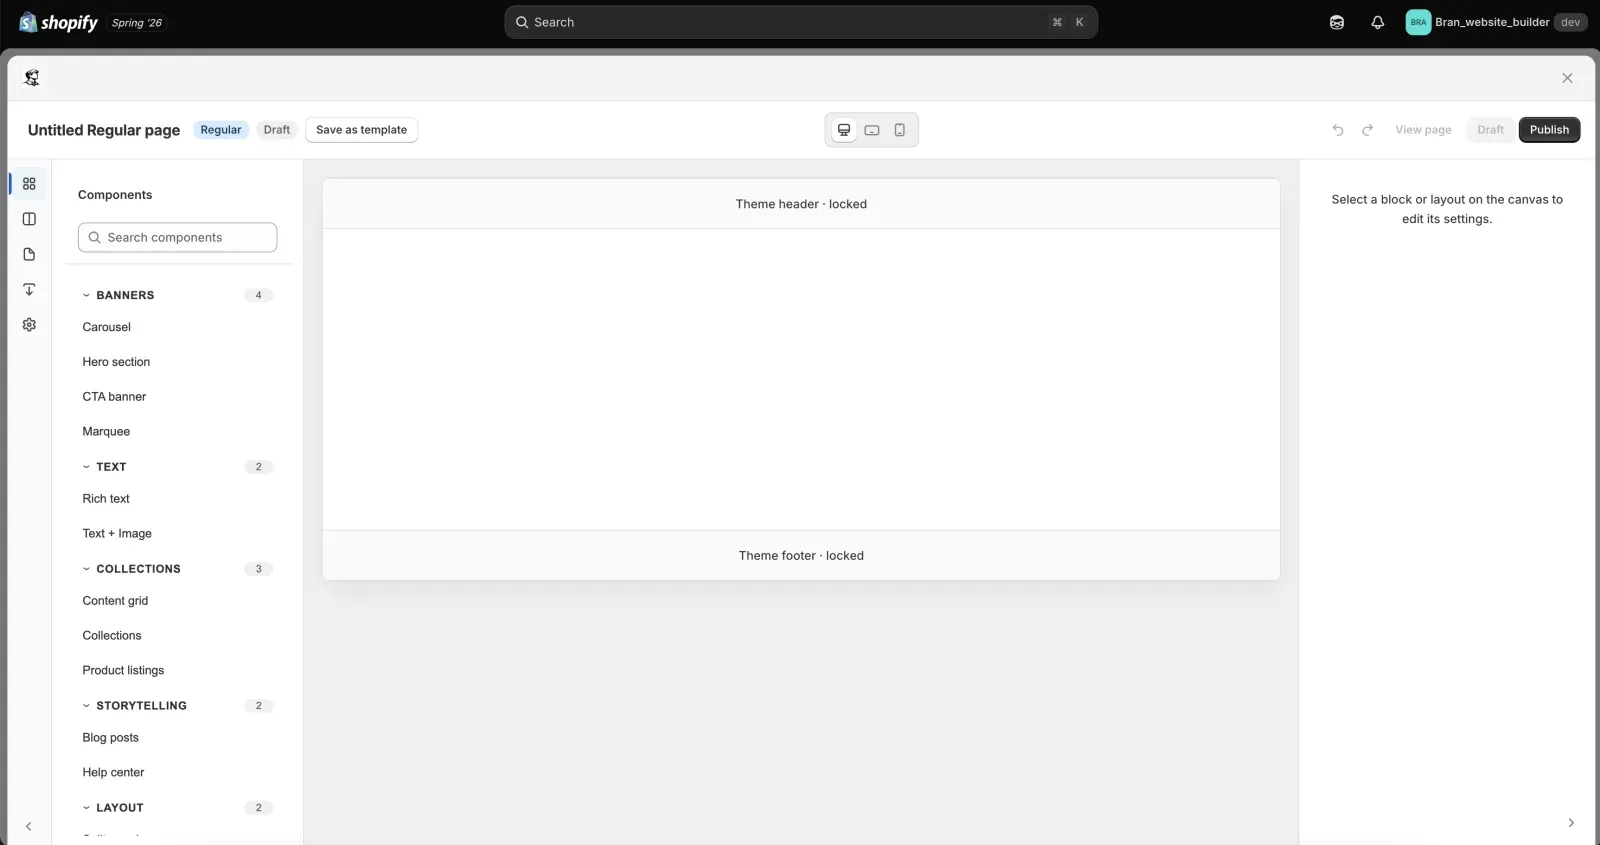
The new page opens in the Bran editor with an empty canvas, ready for your first section.
Step 3 — Build the layout
Section titled “Step 3 — Build the layout”- Add a section to the canvas.
- Open the Components panel and add components into the section.
- Select a component and edit it in the inspector on the right, using the Content, Style, and Advanced tabs.
- Switch between Desktop, Tablet, and Mobile in the top bar to check how the page responds.
- Select Save as you go.
See The page editor for the full walkthrough.
Step 4 — Publish
Section titled “Step 4 — Publish”- Select Publish in the editor top bar.
- For a Regular page, the page goes live on your storefront and a View page button appears.
- For other page types, follow the link into the Shopify theme editor to place the section.
See Publish to your store for details on each page type.
Understand the main areas
Section titled “Understand the main areas”- Home shows recent activity, key metrics, and shortcuts to create or manage pages.
- Pages is where pages are created, edited, duplicated, and deleted.
- Saved templates holds reusable page templates, sections, and blocks.
- Design System controls the shared look of every component.
- Analytics reports page views, sessions, and editing activity.
- Backups snapshots and restores your builder content.
- AI Assistant connects an assistant and shows its past conversations and suggestions.
- Support links to documentation and to our support team.
- Build a short page first — a hero, one content section, and a call to action — and publish it end to end. It is the fastest way to understand the whole flow.
- Keep the page title clear. For Regular pages it becomes part of the storefront URL the first time you publish.
- Use Save often. Publishing takes the current saved content live.
Do I need a specific theme?
Section titled “Do I need a specific theme?”No. Bran works alongside your existing theme and inherits its styling through the Design System.
Can I try a page without making it public?
Section titled “Can I try a page without making it public?”Yes. Pages stay in Draft until you publish them. You can build and preview a draft as long as you like.
Can more than one person edit?
Section titled “Can more than one person edit?”Any staff member with access to the app in Shopify admin can work on pages. Avoid editing the same page at the same time in two places, since the most recent save wins.
Related guides
Section titled “Related guides”Need help?
Section titled “Need help?”If you still need help, contact support via the Contact page.